17 Nov 2024

Overview
This post covers the details around the configuration for the F8 SSD, both hardware and software, as well as BIOS changes and other setup & configuration work.
BIOS Changes
- Disable VTx via BIOS->Chipset->North Bridge
- Disable TOS Boot First (if required) via BIOS->Boot
- One-Time boot from installer via BIOS->Save & Exit->Boot Override->Whatever installer drive is named
- For one time installer boot
- Change Boot Option Priorities to boot Fedora first
- Can disable others if desired
- Must be done post-install
Configuration
Hardware
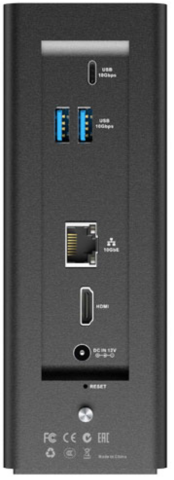
- Terramaster F8 SSD
- For those of us with 10GbE (or more) switching - You may want a 10gbase-t SFP+ so the F8 SSD will have a full 10GbE connection.
- 32GB DDR5 4800MHz PC5-38400 CL40 SODIMM 2Rx8 1.1V Non-ECC Unbuffered
- 32GB Small Form Factor Thumb Drive
- Used as OS drive
- Placed in one of two external USB 3 ports
- Can't put in internal USB port; maybe a size limit on that port.
- 4GB Small Form Factor Thumb Drive
- Default USB thumb drive that's on the internal USB port
- Included in stock F8 SSD
- Fedora 40 installer on it - can leave blank/unused
- Be sure to set BIOS not to boot off it by default if boot order options are grayed out
- 4x M.2 2TB NVMe
- Main ZFS pool - RAIDz1
- 2x M.2 16GB Optane
- Main ZFS pool - ZIL - Mirrored
- 2x M.2 Slots unused
- Future expansion :)
Software
- Fedora 40
- Note: Fedora 41 doesn't have ZFS On Linux support as of 2024-11-14
- ZFS (from zfsonlinux project)
- iSCSI target for Windows editor
Steps
- Install all hardware
- Configure BIOS
- Boot off thumb drive with F40 Server on it
- Use Fedora Media Writer
- Install F40 Server
- Disk
- Select USB thumb drive (32GB in my case) as install drive
- Use custom partitioning radio button
- Delete all partitions from it, if needed
- Auto create partitions using btrfs
- Optionally add /home and /var under btrfs
- Do NOT add a swap partition on any usb storage
- Select USB thumb drive (32GB in my case) as install drive
- Everything else is up to you :)
- Disk
- From BIOS, set Fedora (or whatever your distro is) to boot by default if required
- After booting, login and get a root shell or run via sudo...
- Run `dnf install -y atop vim tmux`
- Run `dnf update -y` in a tmux session
- Run `reboot`
- Wait for system to boot back up
- SSH in and get a root shell or run via sudo
- Install ZFS on Linux (Fedora)
- Run `dnf install -y https://zfsonlinux.org/fedora/zfs-release-2-5$(rpm --eval "%{dist}").noarch.rpm`
- Run `dnf install -y kernel-devel-$(uname -r | awk -F'-' '{print $1}')`
- Run `dnf install -y zfs`
- Run `echo zfs > /etc/modules-load.d/zfs.conf`
- Configure ZPool
- Run `zpool create -o ashift=12 data raidz1 /dev/nvme{1,3,4,5}n1 log mirror /dev/nvme{0,2}n1`
- Configure zvol
- Run `zfs create -sV 4T data/lun0`
- Configure iSCSI target
- See this post
- Run `dnf -y install targetcli `
- Run `targetcli`
- Run `cd /backstores/block`
- Run `create lun0 /dev/zvol/data/lun0`
- Run `cd /iscsi`
- Run `create iqn.2024-04.gpmidi.net:stor1`
- Run `cd iqn.2024-04.gpmidi.net:stor1/tpg1/
- Run `set attribute authentication=1`
- Run `cd luns`
- Run `create /backstores/block/lun0`
- Run `cd ../acls`
- Run `create <initiator name>`
- Run `cd <initiator name>`
- Run `set auth userid=<user>`
- Run `set auth password=<password>`
- Run `exit`
- Run `systemctl enable --now target`
- Run `firewall-cmd --add-service=iscsi-target`
- Run `firewall-cmd --runtime-to-permanent`
- Install ZFS on Linux (Fedora)
- Configure the iSCSI initiator
- ...
- Profit!
